Notes for a hoarder
These are notes/images stolen/borrowed from books/magazines/internet etc. for what reason I don't know. I am a bit of a sucker for hand-drawings that explain something simply.
Plus, they may be useful one day just like the bits of wood, boat bits and sailing junk 'resting' in my garage. I see this page as another 'storage area'.
Bottle Screws
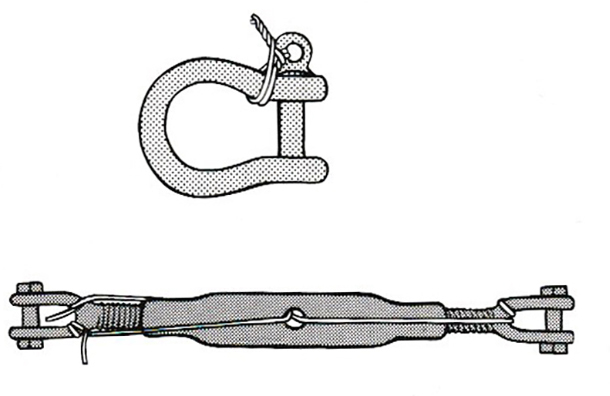
The devils own device with a non-intuitive screw system for delaying a quick launch of a classic boat. Which after fitting and adjustment for correct tension will do its best to unscrew itself and fall into the water.
Turnbuckles, rigging screws or bottle screws are available in galvanised steel, stainless steel and in (very rare) bronze. They are used to tension shrouds on the type of dinghy's I sail. The principle of operation is based on two opposite-handed female threads at either end of the body, into which are screwed fittings for attachment to the rigging etc, As the body is turned, both screws either screw in or out. The overall lenght increases or decreases.
Issues are despite locking nuts if you have a jib sheet on the outside of the shroud, as you pull the sheet on tacking or jibing these devices have a habit of unscrewing itself. When the bottle screw is replaced, ensure that the upper screw is threaded left handed. Under tension rope tends to rub against the bottle screw and despite the used of locking nuts it will eventually unscrew itsself.
Whether securing bottle screws or shackles soft galvanised wire is the easiest to use. As image , two turns in a figure-of-eight pattern will do.
Jibs (2)
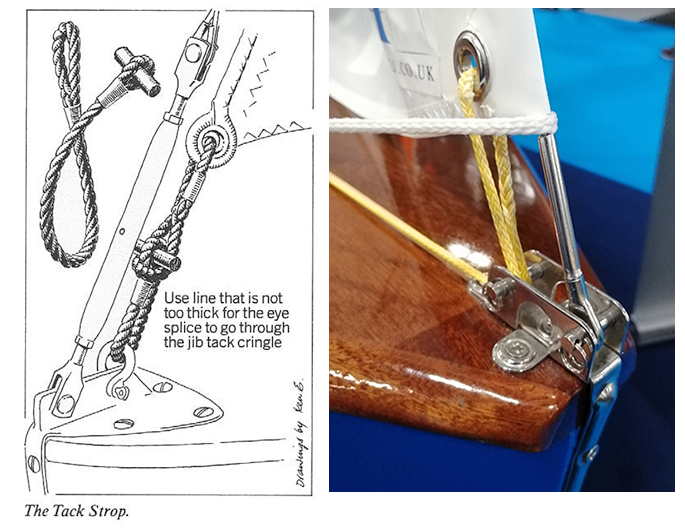
For cruising, a small jib can be a comfort especially for a single-hander. To increase all-round visibility the foot of the jib might be raised a few inches from the steamhead with a short strop. Check to see if the sheet leads need to be altered.
Scull Rowlock
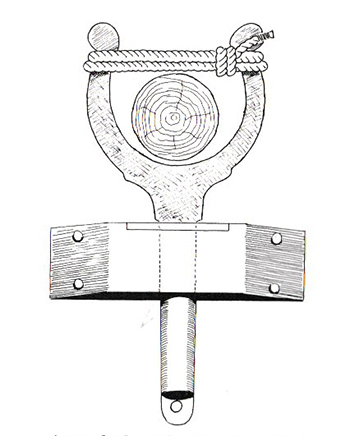
A rowlock with a bell-mouth shape is best for use with a steering oar. A mousing or lashing can be put across the fork of the rowlock to stop the oar lifting out.
Reefing Improvement
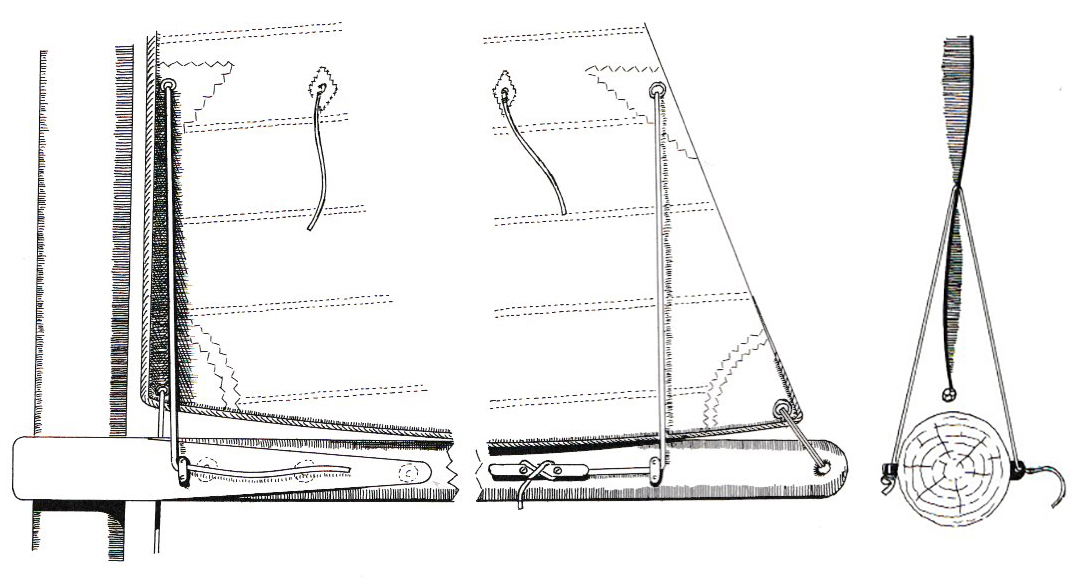
(left) A simple lashing round the boom is often recommended as sufficient to hold down the clew and tack when reefing a small sail. But pendants (or pennants) passing up through the reef eyelets and down to cleats on the boom kelp to make a neater and quicker job.
(right) The pendant seen from aft. The fall end would turn on a cleat as a reef is pulled down.
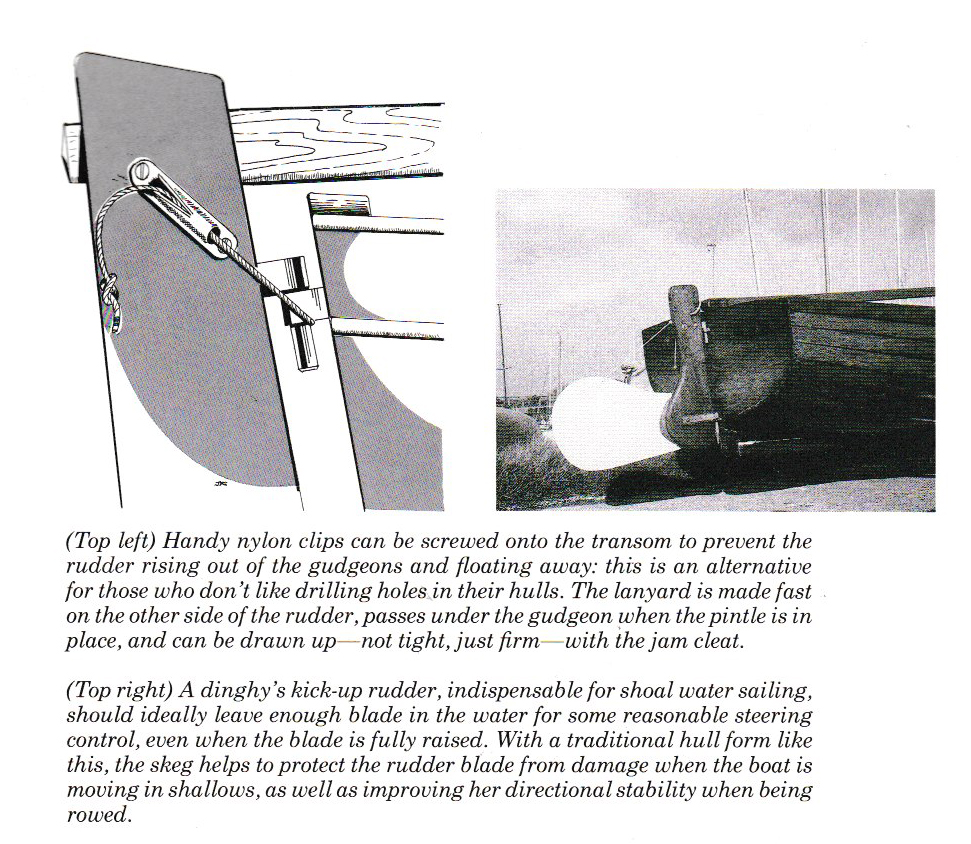
Rudders
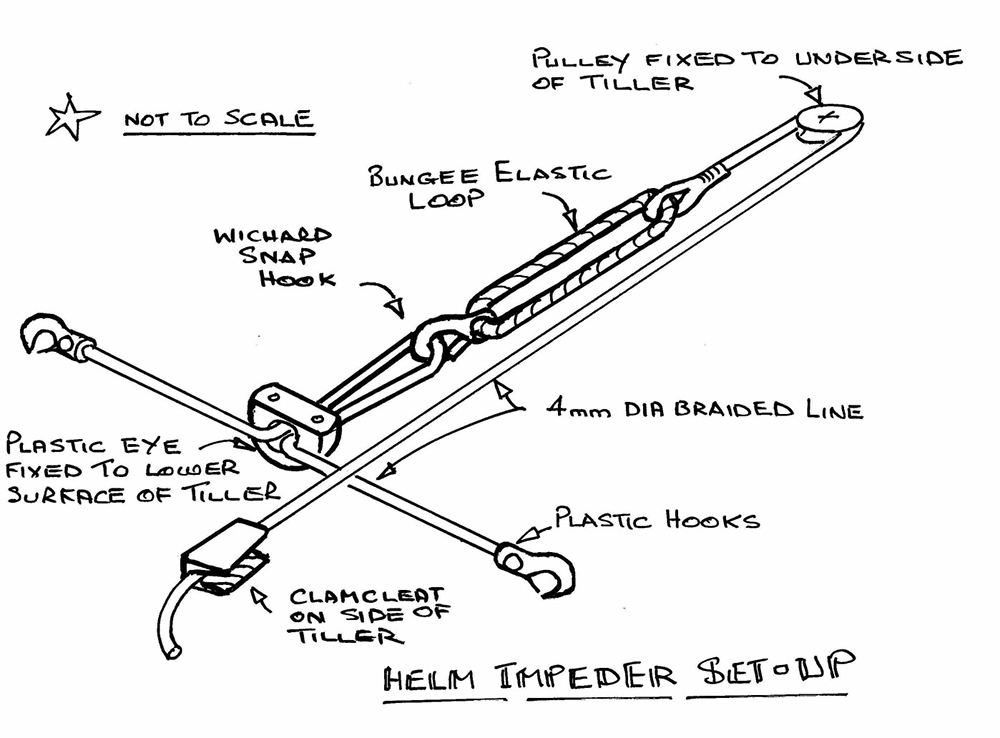
Helm Impeder 3

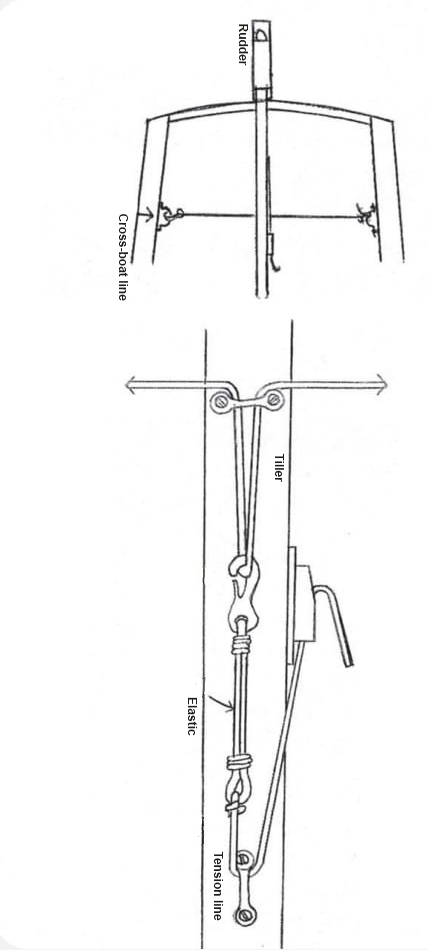
The necessary gear is inexpensive and probably already on most boats: a few blocks, 9 or 10 feet of roughly 1/8-inch cordage, and bungee cords. The first step is determining how to run the steering sail sheet to the windward side of the cockpit. Whatever sail is used, the sheet is initially trimmed through its usual leeward block, then to a block on the windward side of the cockpit beside the tiller. On flush-decked Gannet there are no obstructions. I tie the blocks to the toe rail. On other boats, one or more intervening blocks may be necessary. You want to reduce friction, so the fewer the better.
Next, cut the cordage into approximately 3-foot lengths. Take one of these and tie the middle of it to the tiller with a clove hitch. Then take the two ends and tie as many approximately 2-inch-¬diameter loops as you can. I use reef knots. You should end up with four or five loops.
The two remaining lengths of line are tied off to strong points near where the blocks to lead the jib sheet are. Tie a series of loops in them as well. The purpose of the loops is to provide adjustment for the bungee cords. Give yourself plenty of room when you first try sheet-to-tiller steering. Put the boat on a reach. A broad reach is probably easiest.
I have never been able to get the sheet-to-tiller arrangement to work without part of the jib and part of the mainsail set. The jib is trimmed normally. Run the tail of the jib through the windward cockpit block. Connect two bungee cords to the leeward side of the tiller just tight enough so that when unstretched they hold the tiller a couple of inches to leeward. Uncleat the jib and remove it from the winch. This will require hand-holding the sheet briefly. You don’t want too big a steering sail. Hand-trim the sail so it is drawing properly. Wrap the sheet around the tiller three or four times and tie it off with a slippery hitch.
And then it is just about finding the right balance.
The jib will pull the bow off the wind, and the mainsail and the bungee cords are going to be pulling it up. You might need to ease or tighten the mainsheet. You might need only one bungee cord. In strong wind, you might need four. You might need to move one or more cords to loops closer to the tiller or farther away. If your steering sail is set on furling gear, you might need to reduce or increase sail area.
When you get it right, there is beauty to sheet-to-tiller, your boat moving through the water, steered silently by balanced natural forces.
Copied from cruising world at: https://www.cruisingworld.com/simple-self-steering/
Tiller Hold
Jib Downhaul
.jpg)
Jibs never come down by themselves when the halyard is cast off. They do if the sail is set without hanks, but then they fall into the water, and struggling with a jib can make for a hazardous few seconds in a small boat, especially one sailed singlehanded. A downhaul is a simple way to ensure the sail will come when required. Diagram a indicates the best sort for a sail set on hanks: the downhaul leads through a nylon fairlead to a convenient point aft. B is better for a sail without hanks, which needs to be pulled aft as well as down. The downhaul might be coloured to distinguish it from other lines.
Self-attending Jib
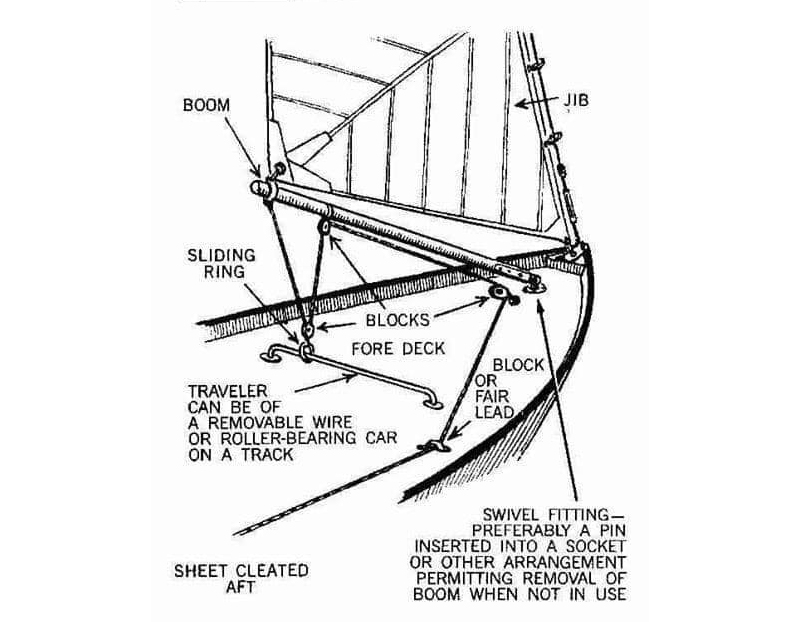
Quite complicated set-up. Looks as if will work
Mast Jaw
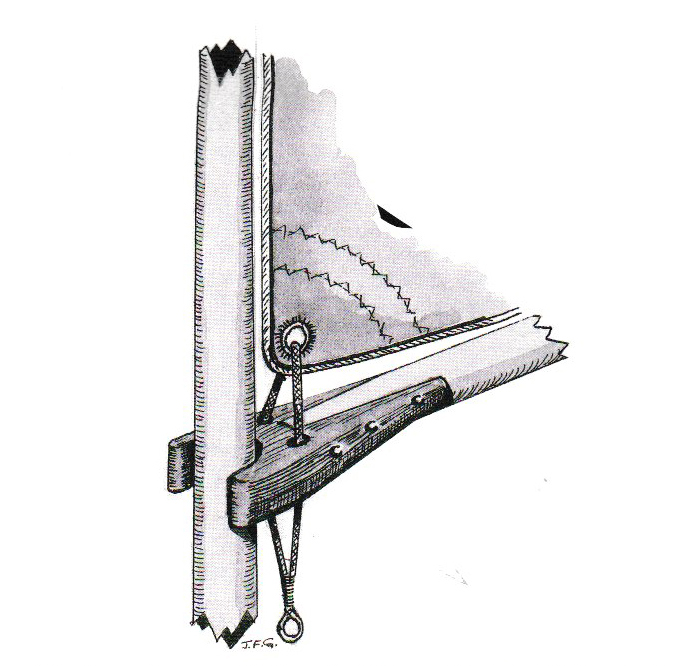
Jaw Beads
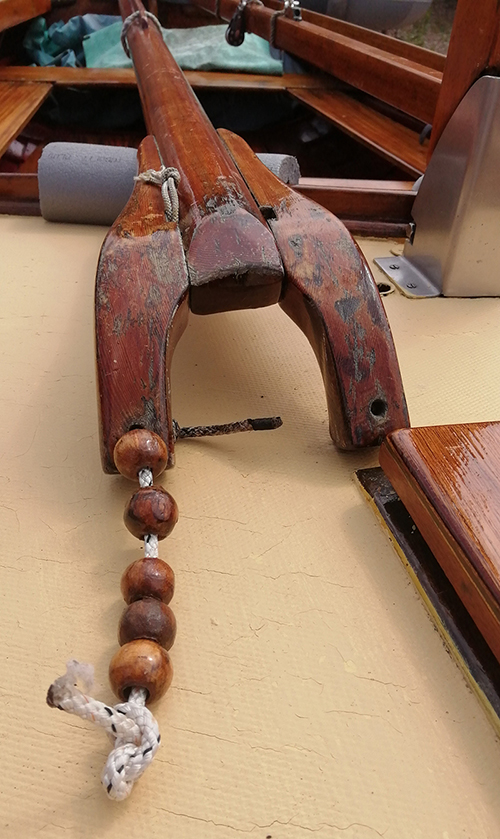
Helm Impeders
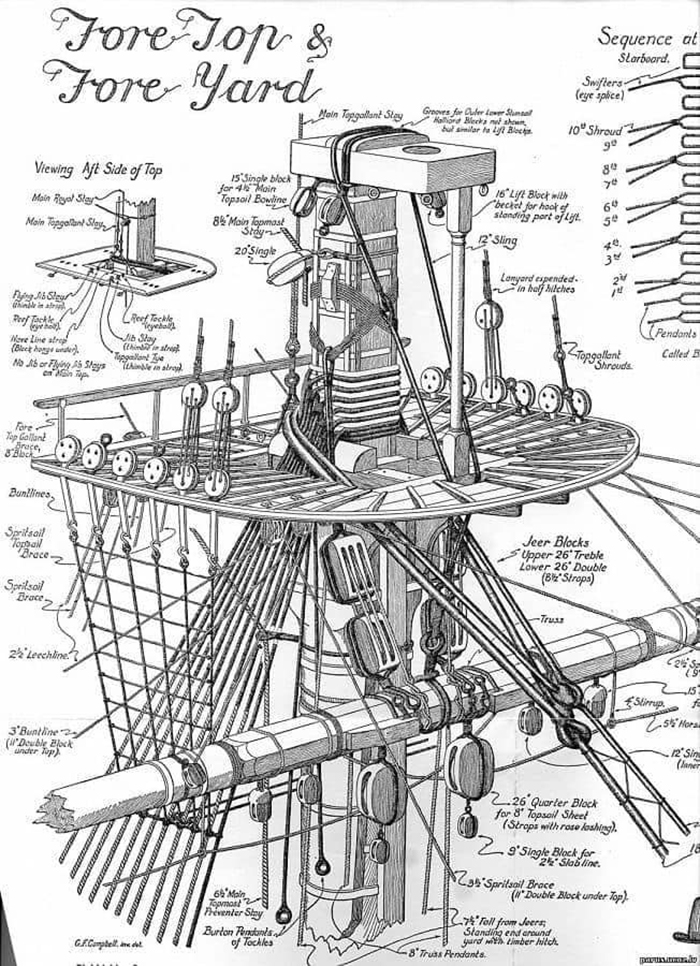
Mast Fittings
- of no use but to a few people in the world, but arn't they good!
The Snotter
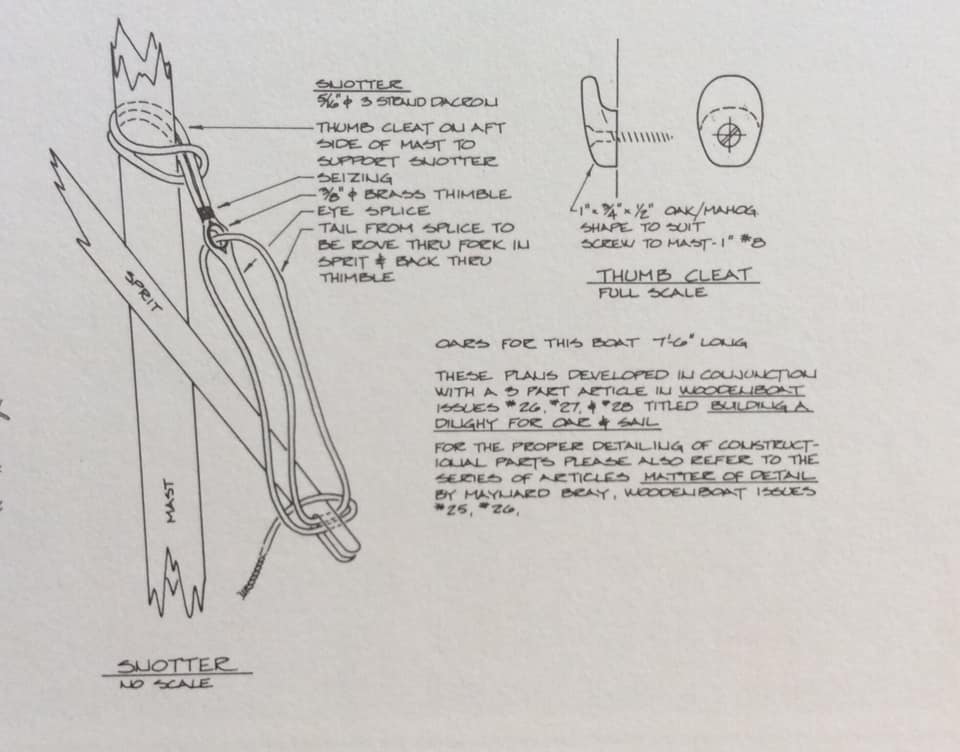
The sprit attaches to the mast with a line that is known as a "snotter".
This line has one end attached to the front of the mast, higher up than where the sprit is to cross it. The other end goes through the end of the sprit then back to the mast again, where it is cleated. The upper end of the sprit has some way of attaching to the upper aft corner of the sail. By tightening or loosening the snotter, the set of the sail can be adjusted.
The forward top corner of the sail can have a halyard.
To lower the sail in a more conventional way, the snotter can be undone or greatly slacked (I should hav e a lot of extra line for this purpose, if you want to do it this way), or the top of the sprit can be worked out of its connection with the top aft corner of the sail. Then the halyard can be slacked to lower the sail.
As you can probably see, there is a lot of hassle with this system.
A simple braille system will probably work better.
The braille line attaches to the the sprit, goes through a block on the mast then down.
To furl the sail, first slack the snotter then pull on the braille line until the top of the sprit is against the mast, then wrap the sail around the mast.
If your sail has a boom, the braille line can go through an eye on the sprit and attach to the boom. Then you pull on the braille line until the aft end of the boom is against the mast. Then the end of the braille line you have in your hand can be wrapped around the sail several times to bundle it to the mast.
This system speeds the process up considerably.
You could also go with a standing sprit.
With this method, the snotter is a non adjustable piece of line, with one end fixed to the front of the mast and the other fixed to the front of the sprit.
A second fixed line goes from the top of the mast to the aft end of the sprit, to hold it in its upward position. A second halyard is attached to the top of the sprit, to raise that end of the sail and to adjust its tension.
To lower the sail, just relieve both halyards.